How to change/Apply pipeline configuration
What is pipeline configuration?
Using Pipeline configuration, the user can Change join conditions between nodes and add additional conditions with this join.
Prerequisites
Existing (.ds) Datasets having at least 1 matching column.
Database tables have at least 1 matching column.
info
With Initial release, the user can join only datasets that are created JDBC source
1. Create Pipeline with Existing Datasets
info
To create a pipeline with Existing datasets, you should have at least 2 datasets with at least 1 matching column.
Here, to demonstrate how to create a pipeline,
Customers.ds , which has information of customer details
Offices.ds , which has information on Office data
Let's get started with pipeline creation;
log in to the OPNBI application with valid user credentials
Go to Master Data > Dataset section from the Hamburger menu
From the footer menu, click on create pipeline button to create a new pipeline

Once you click, you can see a blank create pipeline window as in the below image,
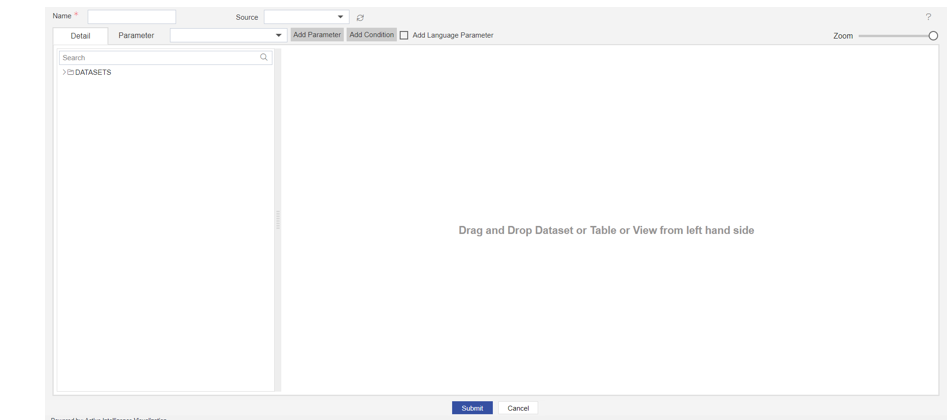
info
If you want to know the terminology of this window, please click here
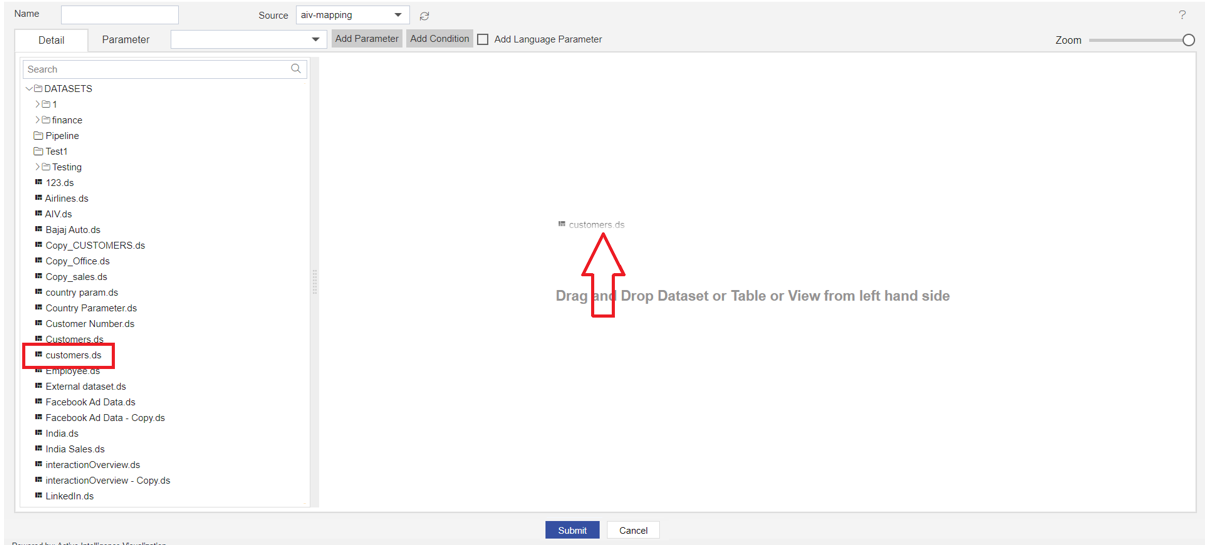
You can see in Source : OPNBI-mapping is selected which means you can see the list of datasets in the details tab. form the list of dataset search for datasets we will require. First, we required a customer's table so we will search for the customer's dataset using the search box and drag and drop this dataset from list to playground.
Once you drop the dataset, a list of the column will be displayed for that selected dataset.
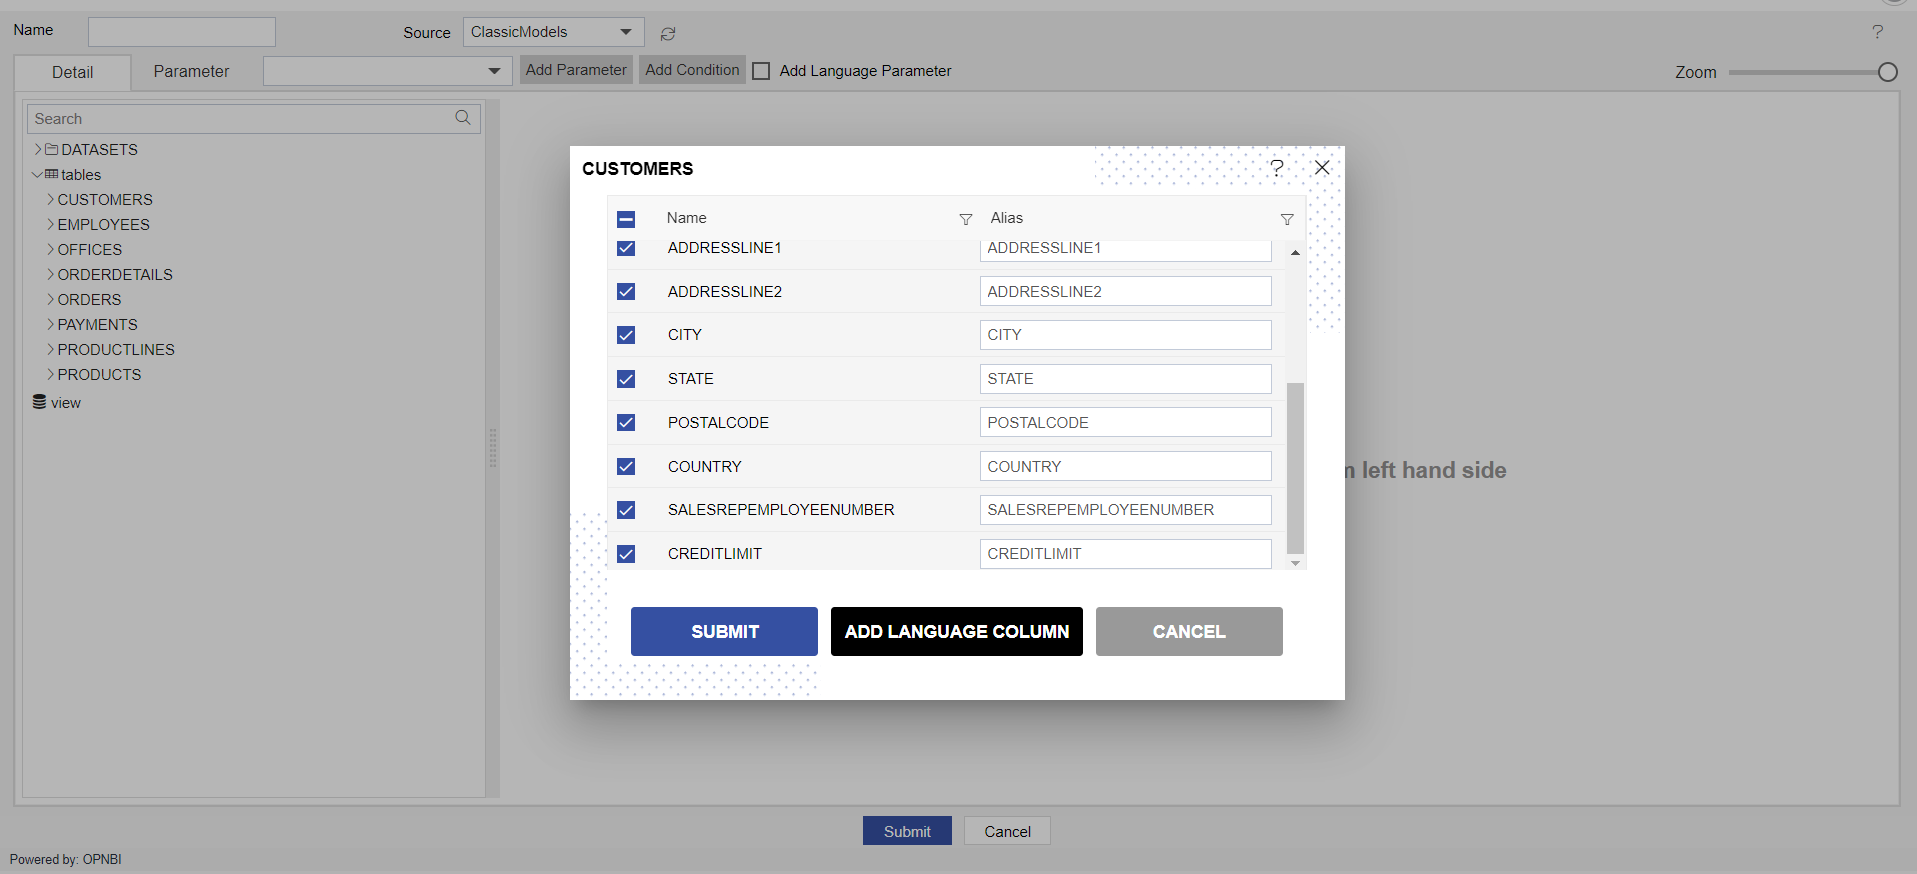
Here users can select or de-select columns to be added to the playground with a checkbox provided with each column name. By default, all columns will be selected.
Click on submit to add a node to the playground. Add a second node into a playground the same way we did earlier.
Create join between 2 nodes by drag and drop. To know about how to create joins in pipeline refer to the documentation of how to create pipeline and navigate to Type of Join Click here to navigate
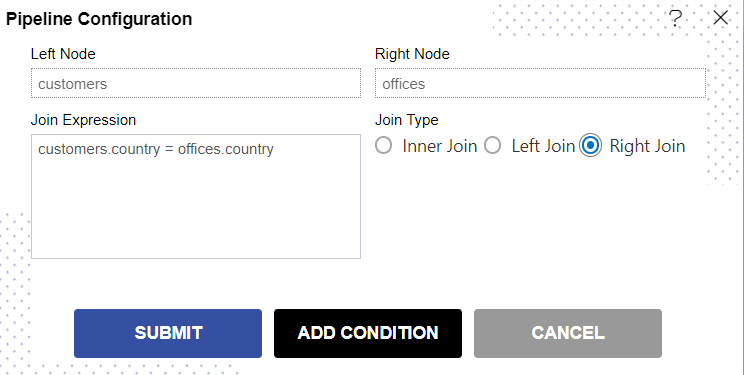
To change the join condition, click on this venn diagram and you will see Pipeline configuration window will be open,
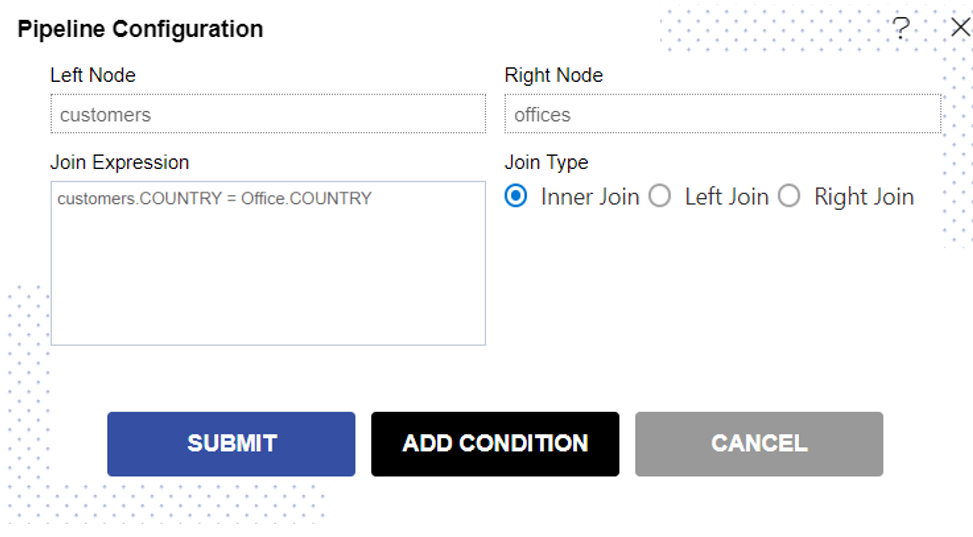
Let's understand Each point in this configuration;
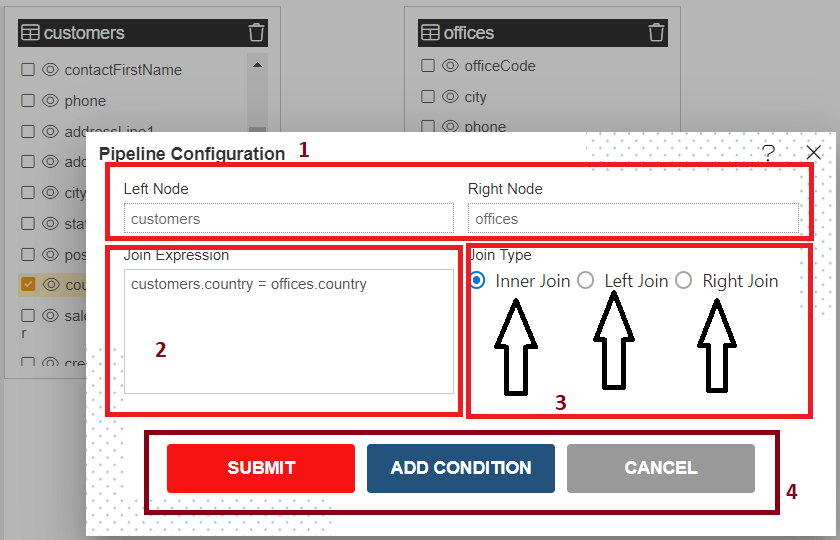
1. Left/Right Node Name
This First point Shows the name of the node on the left and right sides. Now, this completely depends upon the direction of the arrow means from which node to which node we are making the connection.
In this example, we have provided join from customers node to offices node. so the source node is the customer and the destination node is the office. That is why you can see the customers node name in the Left node and offices in the right node.
If we make join from offices to customers then you would see offices in the left node name and customers in the right node name.
2. Join Expression
In this field, you can see the join expression created by the drag and drop function and columns with which join has been applied.
info
This is a noneditable field so the user can not change expression from here. To change the join column, the user has to click on the delete icon on the arrow and create a new join line with the required column.
In this example, we have applied join between the country column of 2 nodes so you can see in the screenshot the expression is customers. country = offices.country that means the country from the customer node is compared with the country of offices node.
3. Join Type
There are 3 types of join users can make using this pipeline configuration,
Inner Join : This option is by default selected. With an inner join, the user will get the matching data from both the tables
Left Join: Using this checkbox option user will have Whole data from the Left side of the node and only match data from the right side of the node.
To apply these changes, just click on the Left join radio button,
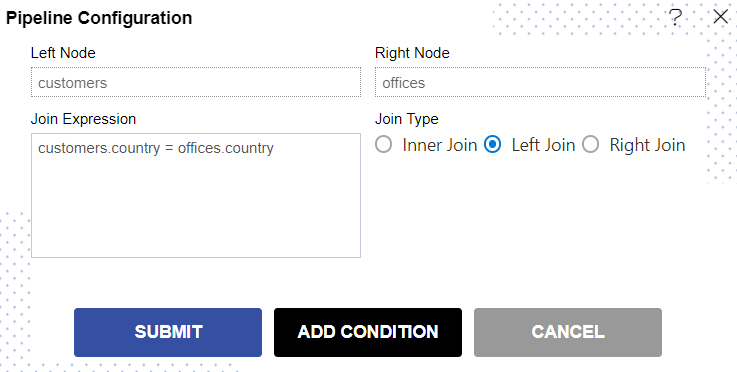
Click on submit button and you will see in
venndiagram left part of the circle is filled. That means left join is applied between nodes.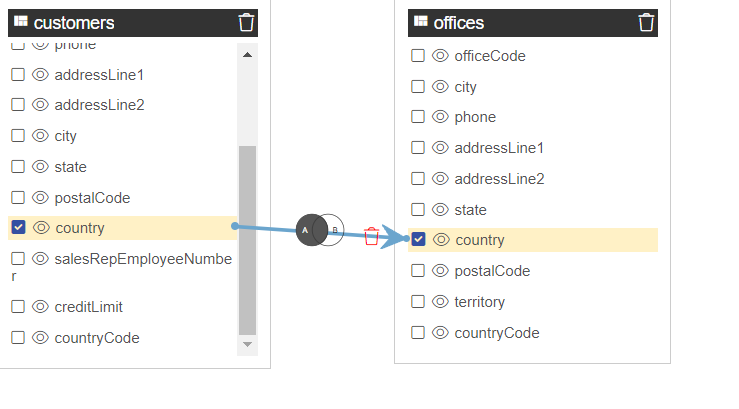
- Right Join: Using this checkbox option user will have Whole data from the right side of the node and only match data from the left side of the node.
- To apply these changes, just click on the right join radio button,
Click on submit button and you will see in
venndiagram right part of the circle is filled. That means a right join is applied between nodes.
4. Submit/Cancel/Add Condition
Submit: To add changes to the playground node, click submit button.
Cancel: to discard changes made in the configuration window, click on the cancel button
Add Condition: From here, the user can add more conditions above the join condition.
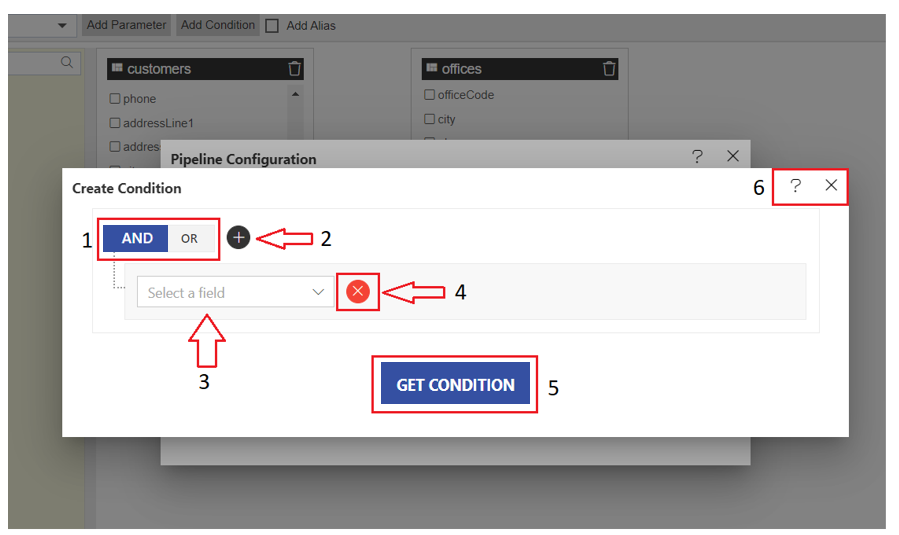
Add Condition Terminology
To add conditions on top of join conditions, click on Add condition button and you will see Create Condition window open as shown in the below image,
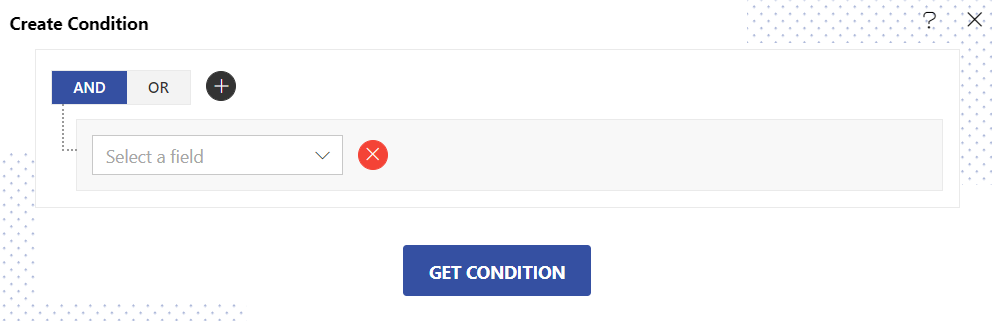
- Condition Type: you can apply conditions with logical
ANDandORoperators
info
TO know more about how this logical operator works, Click Here
By Default, conditions will be selected and a single line of field dropdown will be displayed. The user needs to select the column on which he wants to apply the condition.
info
You can also apply condition on the column on which join is applied
- Add Group/Condition: By default there is only one condition. It allows you to create conditions and group them using AND/OR logic. To add more conditions or groups of conditions you can click on this button and it will ask you to select one option from the list of 2.
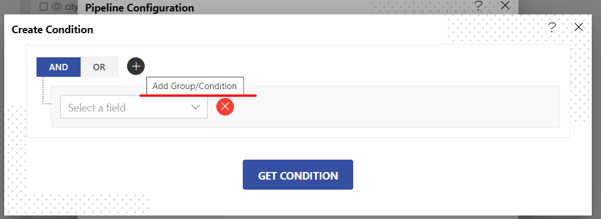
One is Add Group and the second one is Add Condition.