OPNBI SSO & External security
Introduction
OPNBI allow single sign on option so that OPNBI can be integrated with third party application as an integrated solution. In this exercise you will learn to implement simple Single sign on code which will validate users against users availalbe in opnbi.
In order to work with SSO first we need to fetch users from client source. source might be CSV file or database.
OPNBI allow configuring external security so that you do have to redefine users and roles within OPNBI application, to use external security you need to implement a java interface.
OPNBI SSO: This Video shows how to configure and use SSO with OPNBI
In this Document you will learn to implement simple Single sign on and external security which will validate users against CSV file. Sample Project File for SSO and External security can be downloaded from Here..
There are 3 ways to get users in opnbi using external securty;
Fetch user from CSV file
In this document, we demonstrated using CSV file
Fetch user from Database
Click here to know more on how to fetch user data from Database
Fetch user from LDAP
Click here to know more on how to fetch user data from LDAP
Data file you required:
(a) SSO and External security project files
(b) Eclipse IDE
Prerequisites
Downloaded Sample project from Here..
Implement Exteral Security
info
Amoung the 3 ways of fethcing user using Exteral Security mentioned above, here we are demonstrating it using CSV file.
Follow below steps to Implement external security with CSV file;
- Download Files and extract in your local storage folder. you will see a two folder:
OPNBI External Security
OPNBI SSO
Import both these projects in eclipse to make path changes in this sample project.
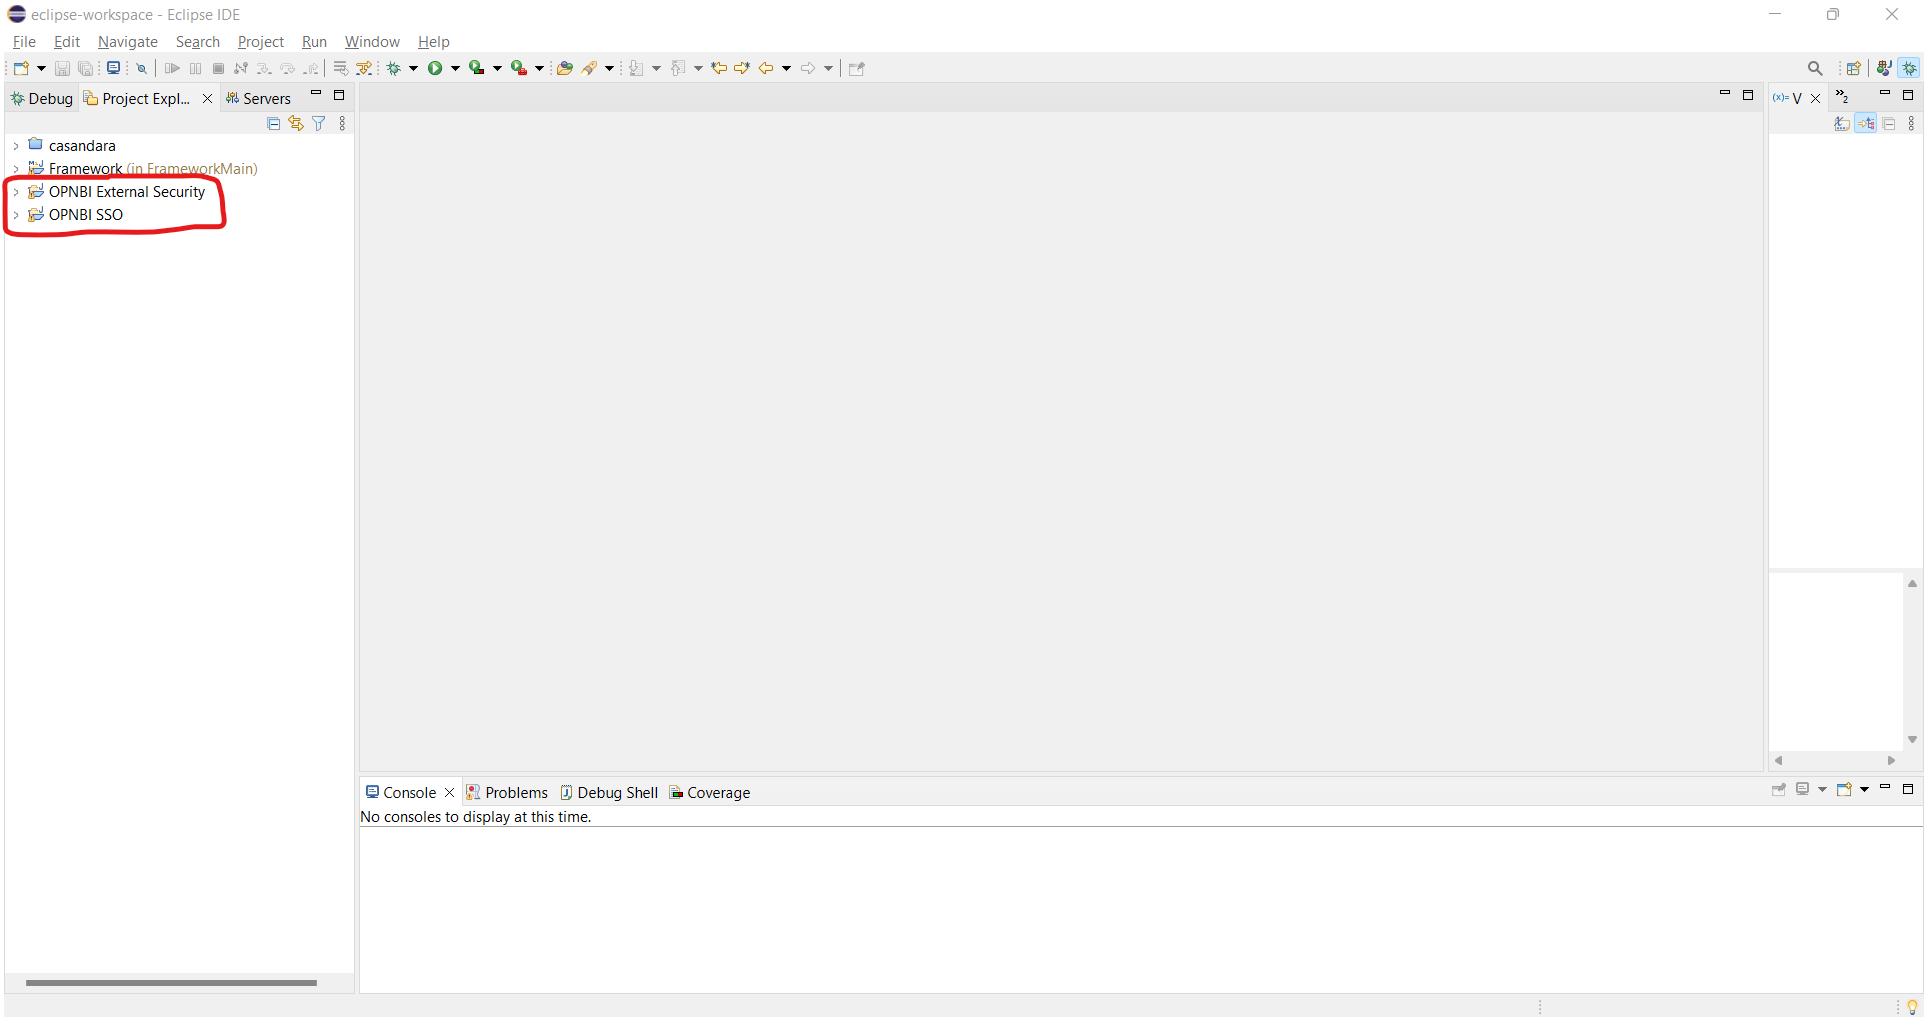
info
If you are facing errors in project after importing in to eclipse, go to build path and change external and Mysql jar path. both jar file is attached with sample zip project you have downloaded.
Now expand external security project, and expand files folder. This files folder contains csv files for user, role and user-role mapping sample information and other .properties files which will be used in case when your user data resides in database.
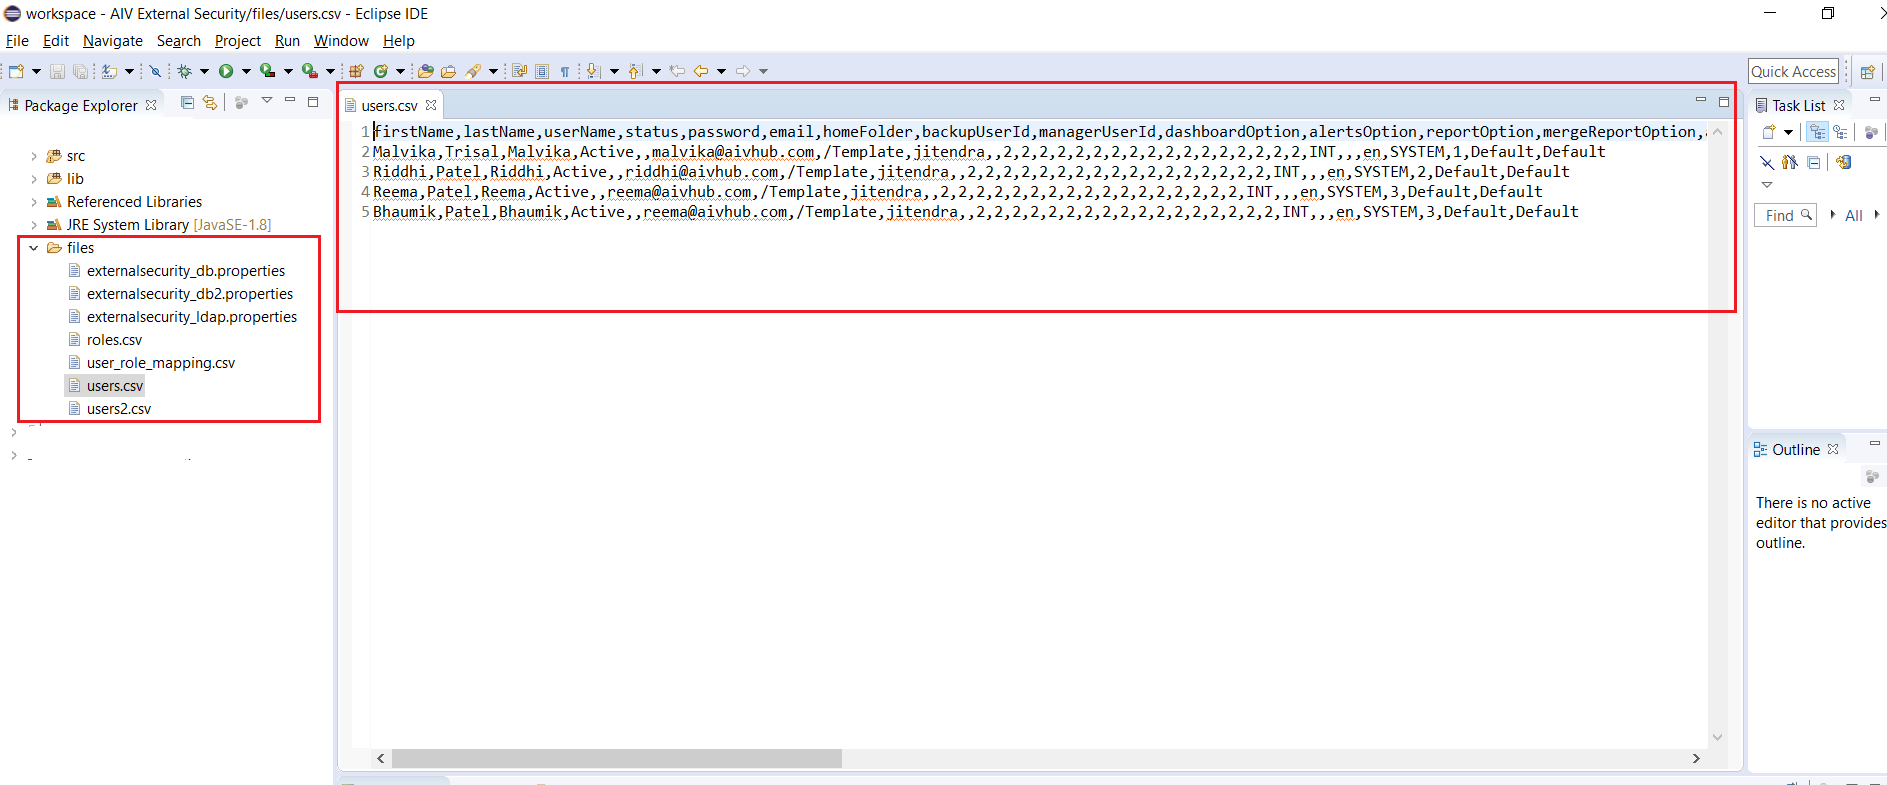
info
This csv contains sample data information of users for demo purpose, you can change csv file to work with your user data. But make sure changes you made in users.csv file should be horizontally implemented in all other csv files wherever required.
To change path of this csv files in your project, expand src folder and open ExternalSecurityCSVImpl class file available in com.opnbi.externalsecurity package.
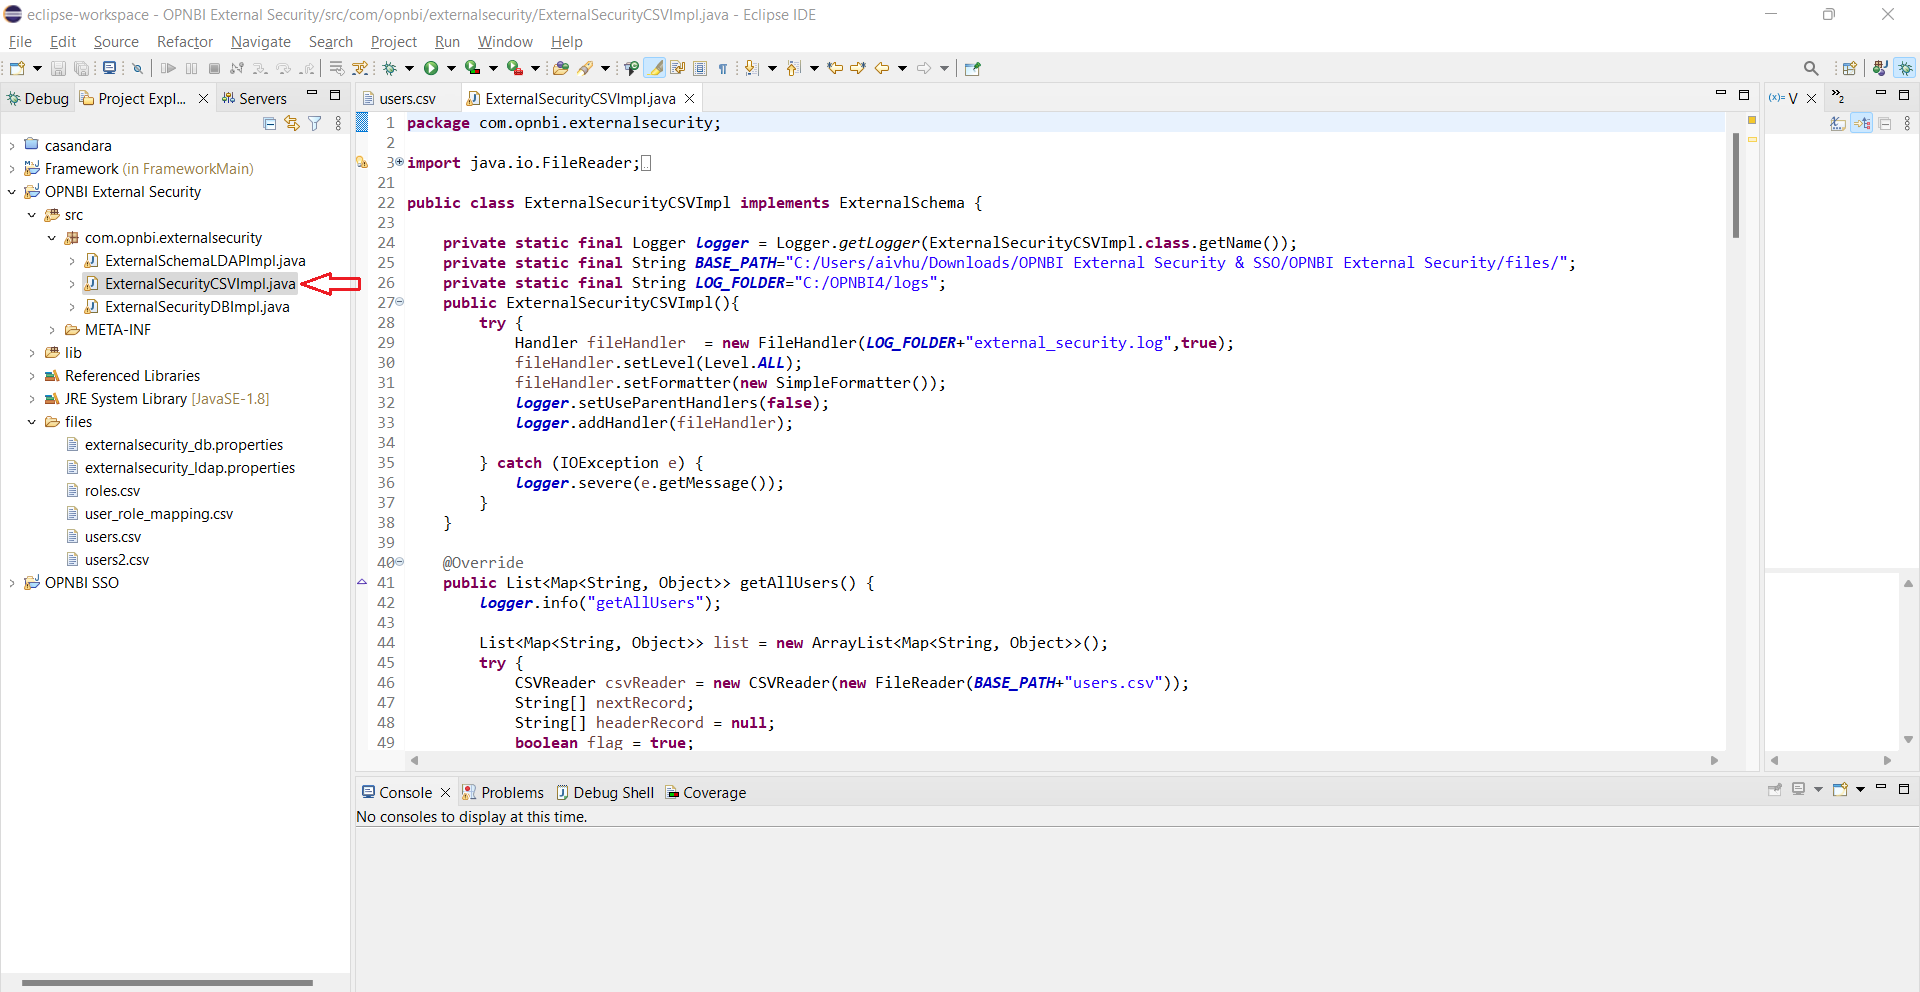
Provide path of csv files here at variable BASE_PATH as shows in below image,
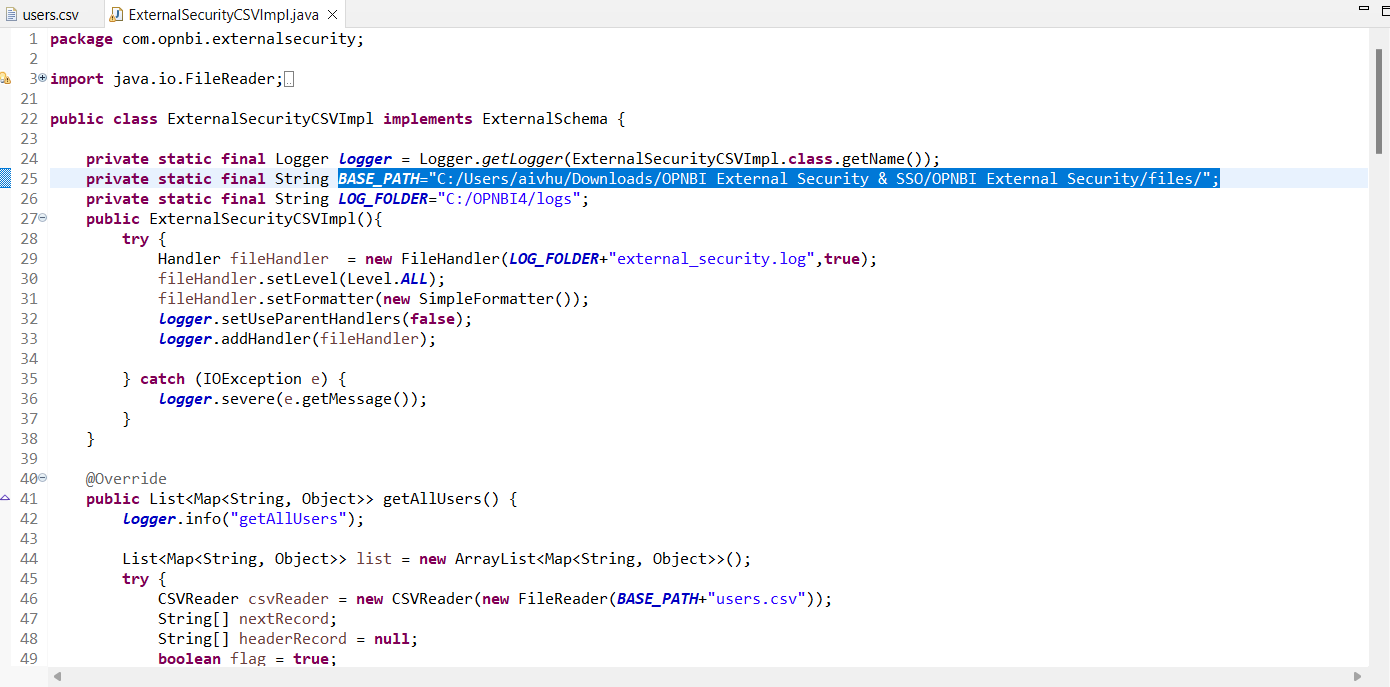
Save this class file, now expand sso project folder and open OPNBISSOImpl class, provide valid path to store log files.
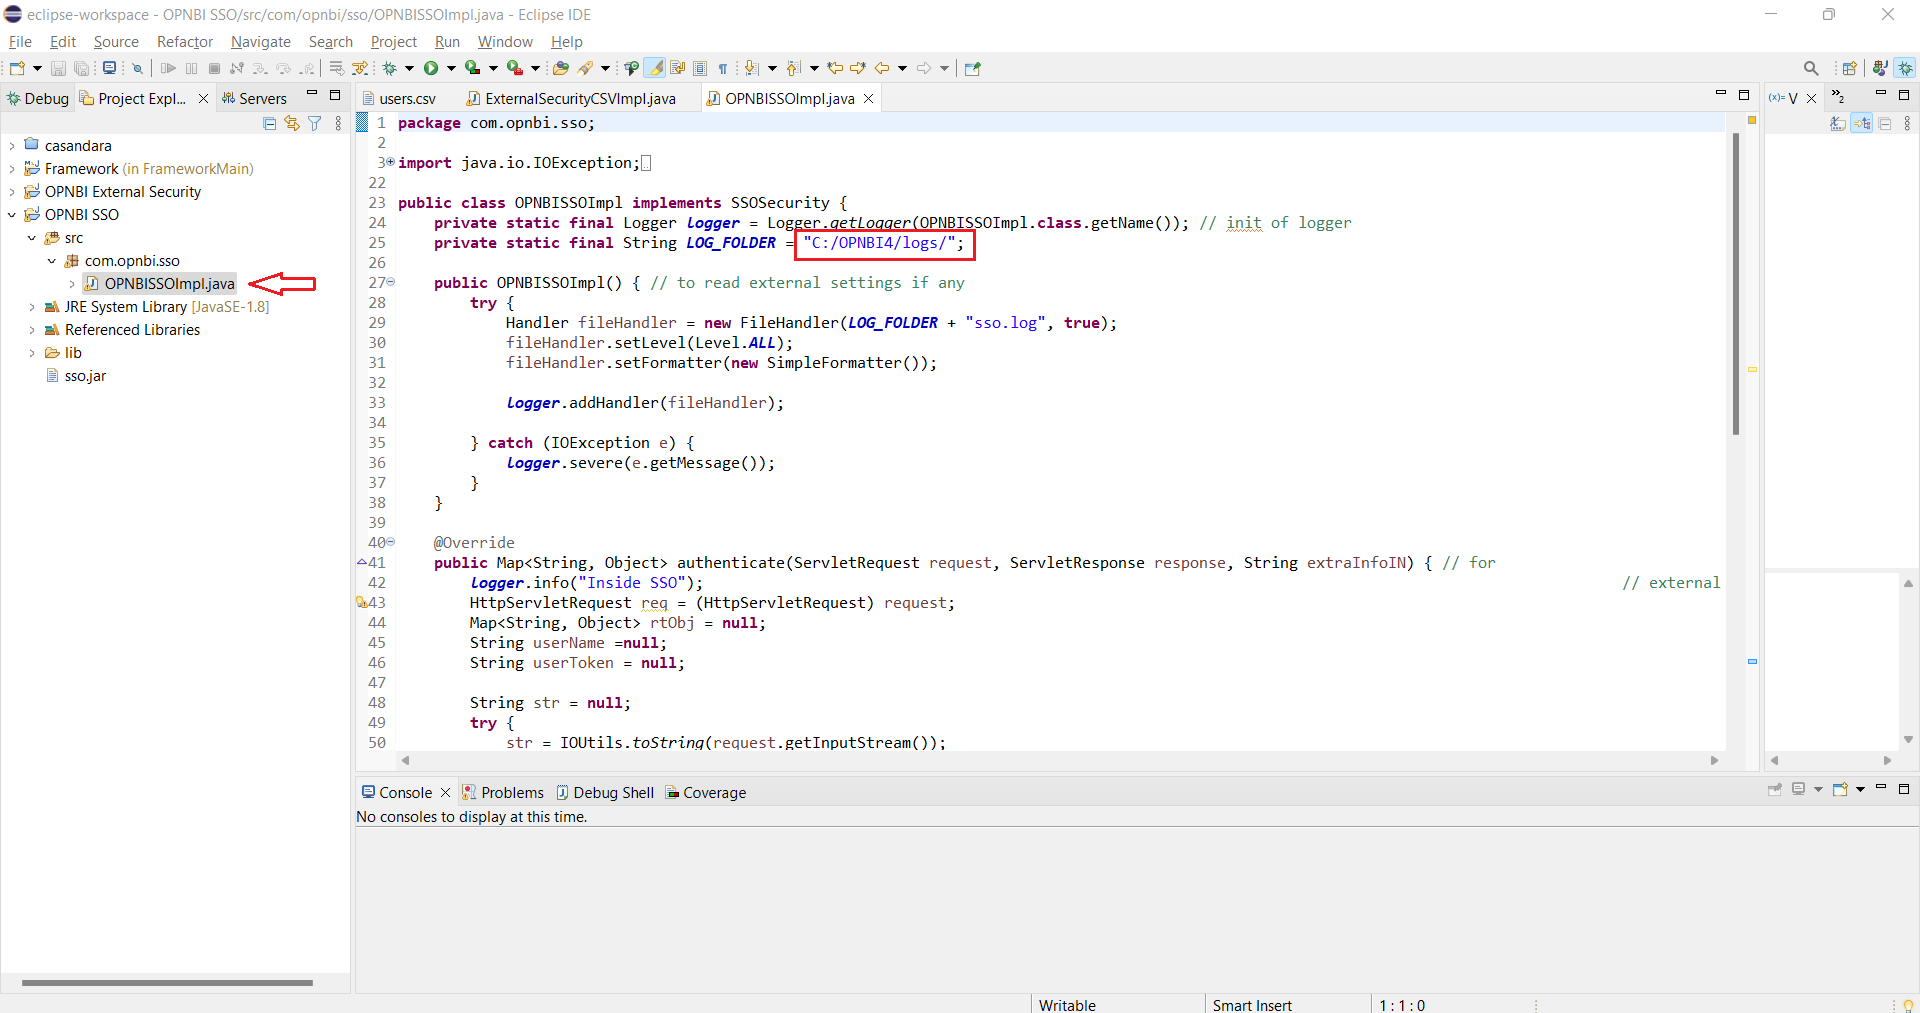
info
Save this file and export whole project as a jar file and save it in local storage.
Do the same with external security, export OPNBI External security project as jar file and store it in local storage.
Paste External Security & SSO JAR File into location [C:\opnbi\apache-tomcat\webapps\opnbi\WEB-INF\lib]
In order to use it, you need enable SSO and External security from OPNBI Configuration page.
Click on Hamburger menu and Go to Administration > OPNBI Configuration section, Click the checkbox of External Security, as shown in figure.
Select the Secure Radio Button of Editable User Properties and Editable Roles Properties.
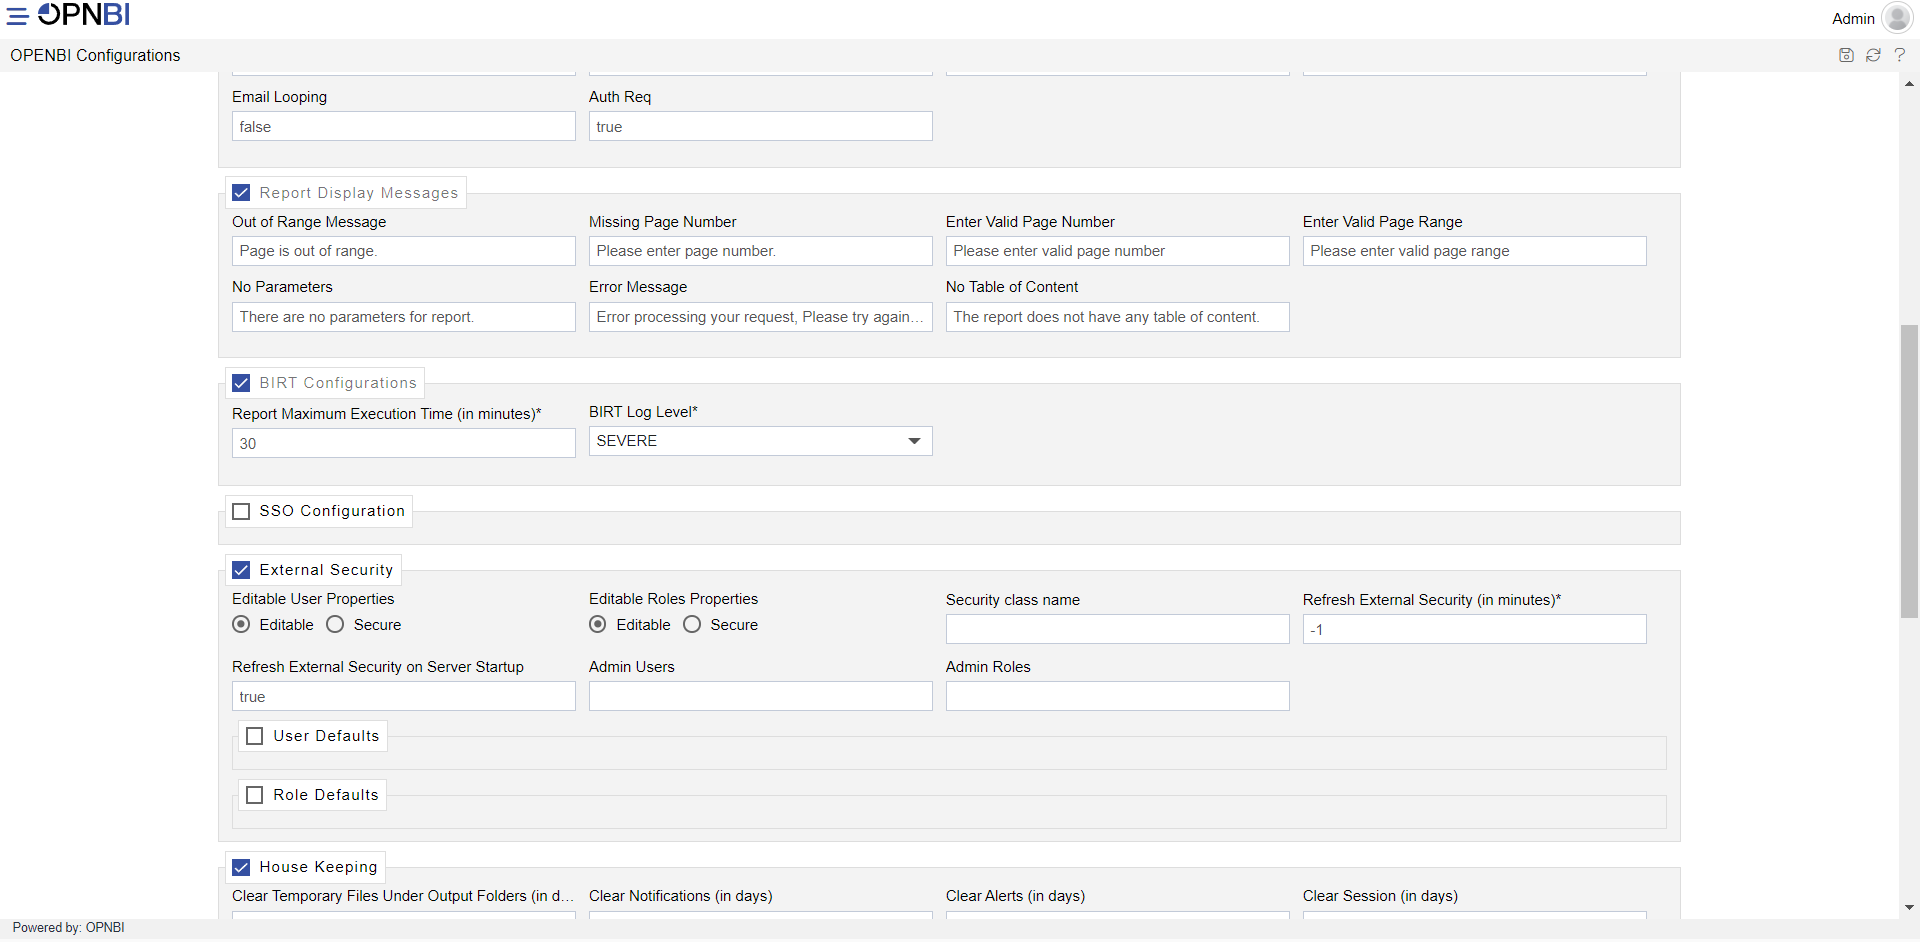
Enter in Security class name:
com.opnbi.externalsecurity.ExternalSecurityCSVImplEnter in Admin Users: Admin
Enter in Admin Roles: Administrator
info
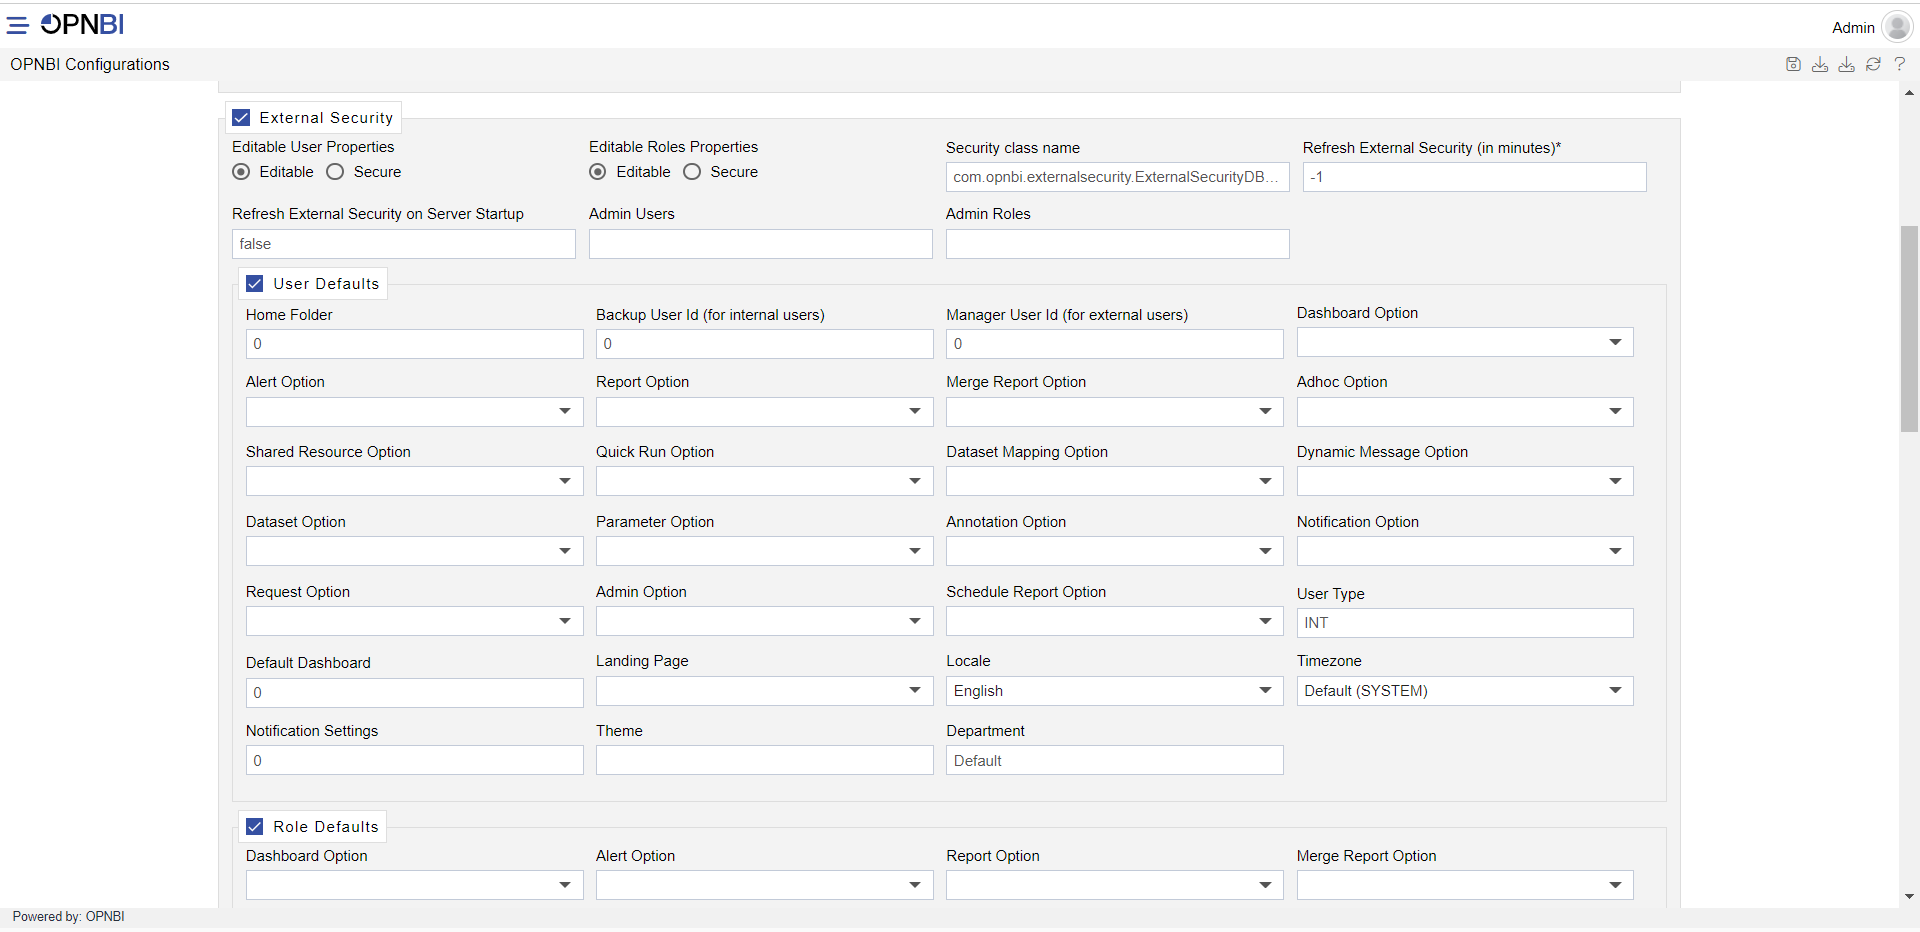
If you are fetching user data from database, then class name should be the com.opnbi.externalsecurity.ExternalSecurityDBImpl and in case of LDAP class name should be com.opnbi.externalsecurity.ExternalSchemaLDAPImpl
Select the Check box of User Defaults and Roles Defaults, as shown in figure.
warning
Please go through SSO code explanation document before before proceeding to next step. Click here to go on SSO Code Explanation Page.
Click on SSO Configuration check box, it will enable SSO Configuration setting into OPNBI, as shown in figure.
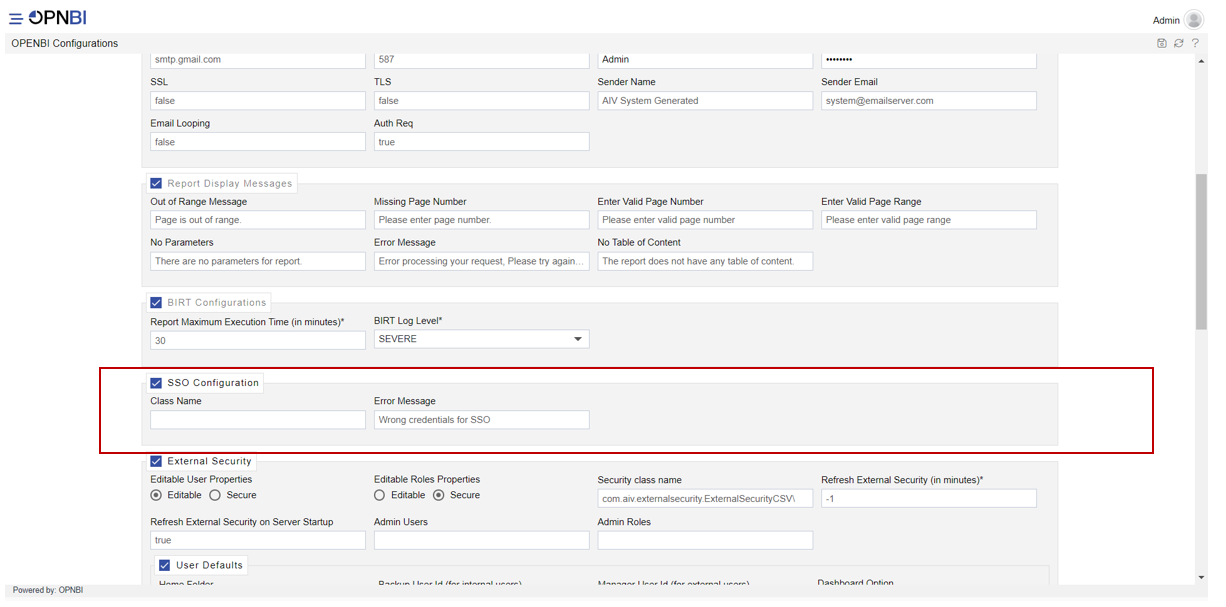
Enter in class name:
com.opnbi.sso.OPNBISSOImpl, as shown in figure. [It impairments SSO Jar File class path]Click on save button to save the changes.
Restart the tomcat server
Once server started, Login into OPNBI, Go to Administration > User section you will find some new users added into OPNBI.
info
If you are not allowed to login using admin user, check in ai_user table admin user is in Active state or Inactive state. Make it Active if InActive and try to login now with admin user.
In case if user or roles not displayed in user or role section, check Logs in Logs folder