Follow steps to Create User :-
Walkthrough this video to see how to create User :-
There are two ways in which a Admin user can create a user in the OPNBI application:-
1. By clicking on the create icon ![]() located at the bottom most toolbar.
located at the bottom most toolbar.
2. By right clicking any existing user and select Create User as follows:-

▶️ Now perform the following steps in order to create a new user:-
1. Click on Create using one of the methods mentioned above which will open the following popup.
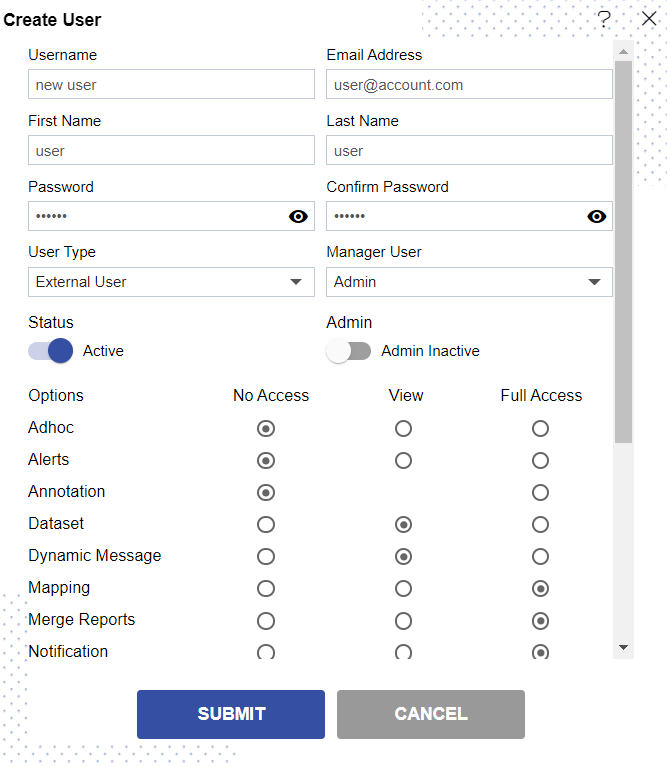
2. Enter the details as shown in the figure above.
3. Let us understand what is the purpose of each field:-
- User Name:- Enter the name you want to give to the user.(*required field)
- Email Address:- Enter the email address of the user(*required field).
- First Name:- Enter the first name of the user(*required field).
- Last Name:- Enter the last name of the user(*required field).
- Password:- Password that a user enters while performing login (*required field).
- Confirm Password:- This is to confirm password, must match the password field(*required field).
- User Type:- User can be either advance User (Internal Users) or end user(*required field).
- Backup User:- This field enables the user to choose a backup user.
- Status:- This is a toggle value which enables/disables user(*required field).
- Admin Active:- This is a toggle value which gives admin rights to user.If enabled the user does not need to provide rights to any section individually.
- Landing Page:- The first page that will be opened on login.
4. You can select what sections must be visible to the end user by selecting either no access, only view or full access radio 2.buttons.In case of any further help, the user can click on the ![]() icon to access the OPNBI help documents.
icon to access the OPNBI help documents.
5. Finally, click on ![]() button to create a new user.
Login with the user credentials as follows to check details of newly created user.
button to create a new user.
Login with the user credentials as follows to check details of newly created user.
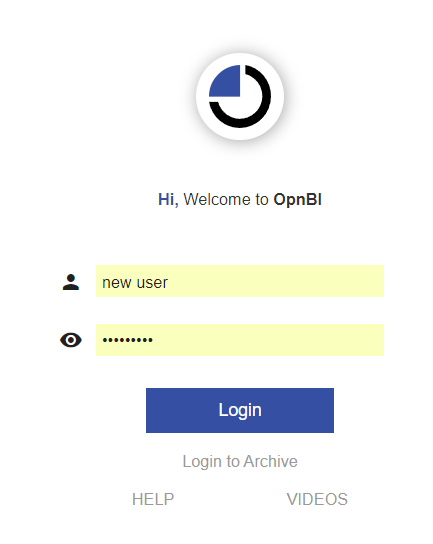
6. After login, the user can access all the sections of OPNBI application whose permission he/she has.
7. If the user is not satisfied and wants to cancel the create request, he can do this by clicking on the cancel button next to submit or by clicking on ![]() button next to the
button next to the ![]() icon.
icon.
8. In this manner, you can create a new user in the OPNBI application.
In order to understand in detail about the features, click on the following links:-