Dashboard Layers
Dashboard Layers: This video contains how to use Dashboard Layers in OPNBI.
The OPNBI application enables the users to create multiple layers within a single dashboard which may contain many different tabs.
The widgets present in different layers within different tabs can be dynamically linked with each other.
In this example, we will create two layers where first layer contains the detailed sale of products in form of table widget, whereas second layer displays the pie chart of the percentage of sale of products based on line of products.
In order to do so, follow the steps as below:-
By default, any OPNBI dashboard contains one layer and tab.
First we will add a table widget in this layer as follow:-
Click on
 the Component icon from the top right corner menu, a list of the available component will open up as follows:
Click on Component Icon from the list of the component into the dashboard, a configuration box would open as follows:
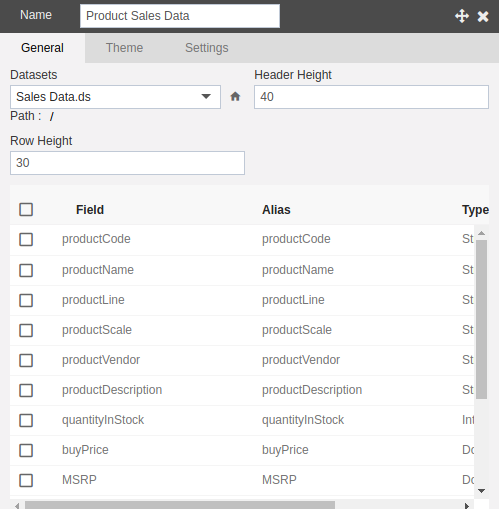
Give name as shown in figure and select Dataset as Sales Data.ds as shown above.
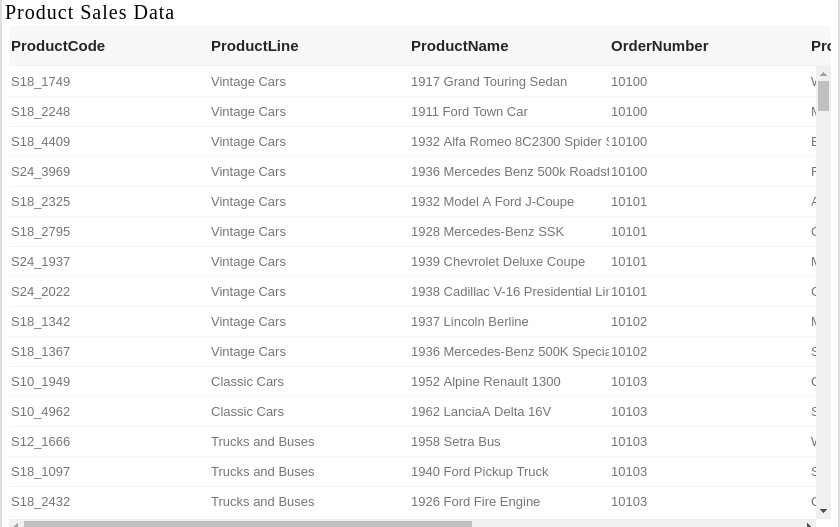
This will create following table:-
Now we will create a second layer for the purpose of understanding.
To add a new layer, click on the topmost
 icon which will open a dropdown as follows:-
Click on icon before "Add new layer" and a new layer will be added to which the user will be automatically redirected.
Add a pie chart displaying percentage of sale of products based on line of products by clicking on
 from the component list.
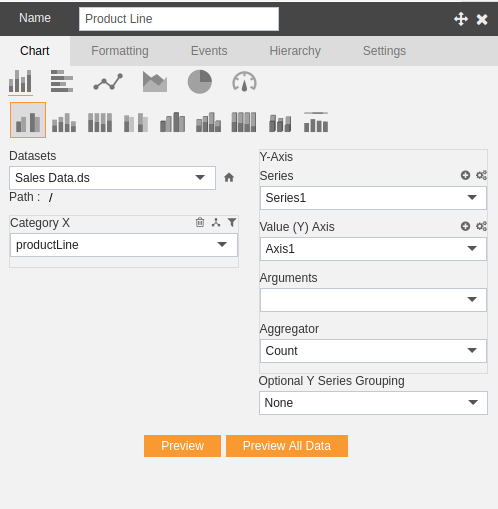
Give name as shown in figure and select Dataset as Sales Data.ds and Category X as productLine as shown above.
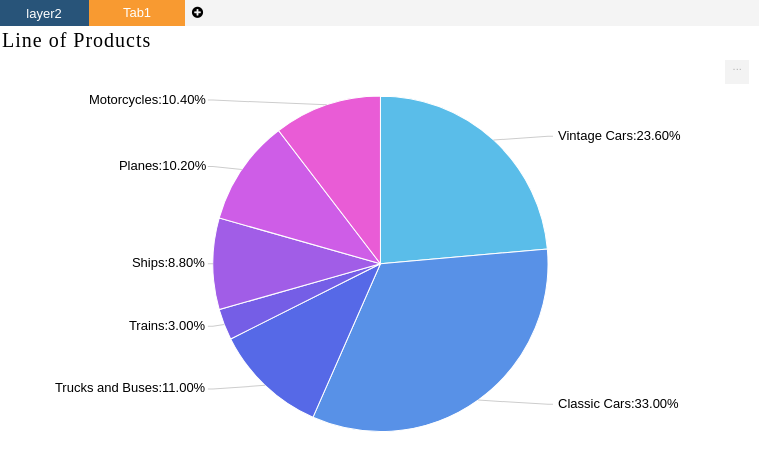
This will create following chart:-
The users can rename the layer by changing the Active layer name from the dashboard settings as follows:-
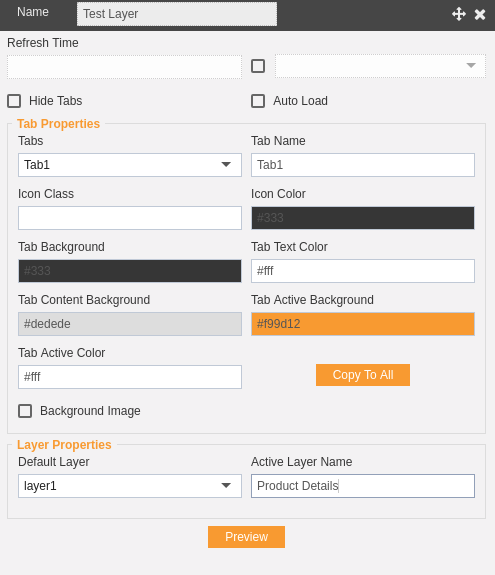
In the similar manner, the user can select the default layer for the current dashboard by selecting his/her desired layer from the dropdown.
If the user wants to delete the layer, right click current layer which will open the following dropdown menu:-

Click on
 to delete the second layer.
However, there must be atleast one layer in the dashboard, so if there is only one layer in the dashboard, the user may not be able to delete it.
In this manner, user can create multiple layers in the OPNBI dashboard. In the next section, we will learn how to dynamically link widgets across different layers.
To know more about advance feature of Table Widgets click on below links:-